See below for how to create an online root CA for your PKIaaS CA hierarchy.
Alternatively, you can add your own root CA as explained in Adding an external root CA.
To create an online root CA
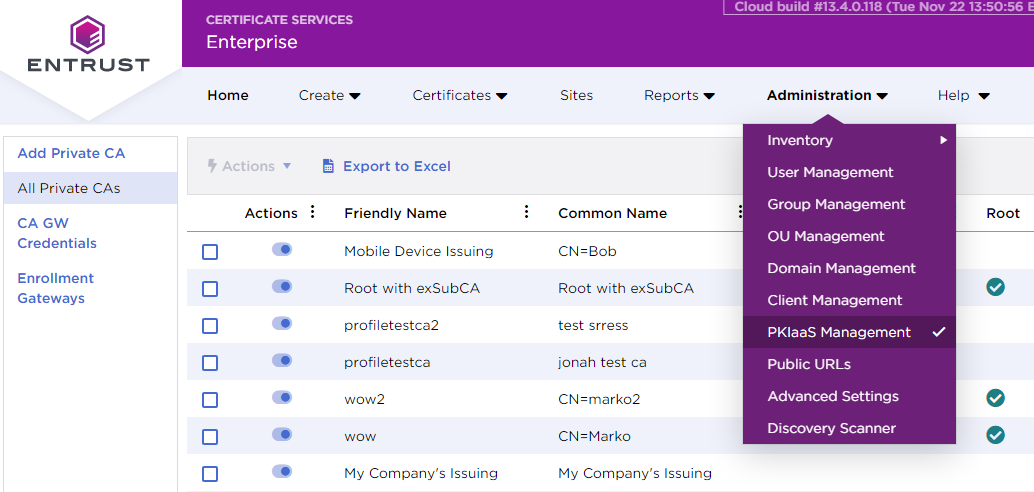
- Navigate to Administration > PKIaaS Management.
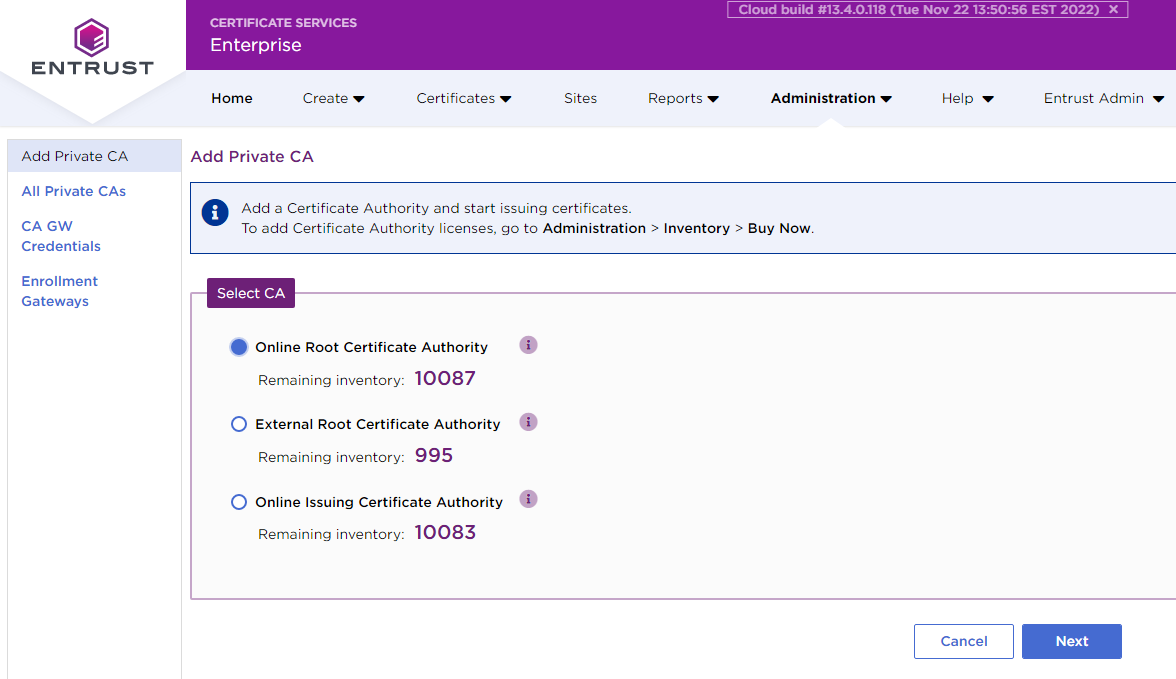
- In the side pane, click Add Private CA.
- In Select CA, choose Online Root Certificate Authority.
- Click Next to display the CA information screen.
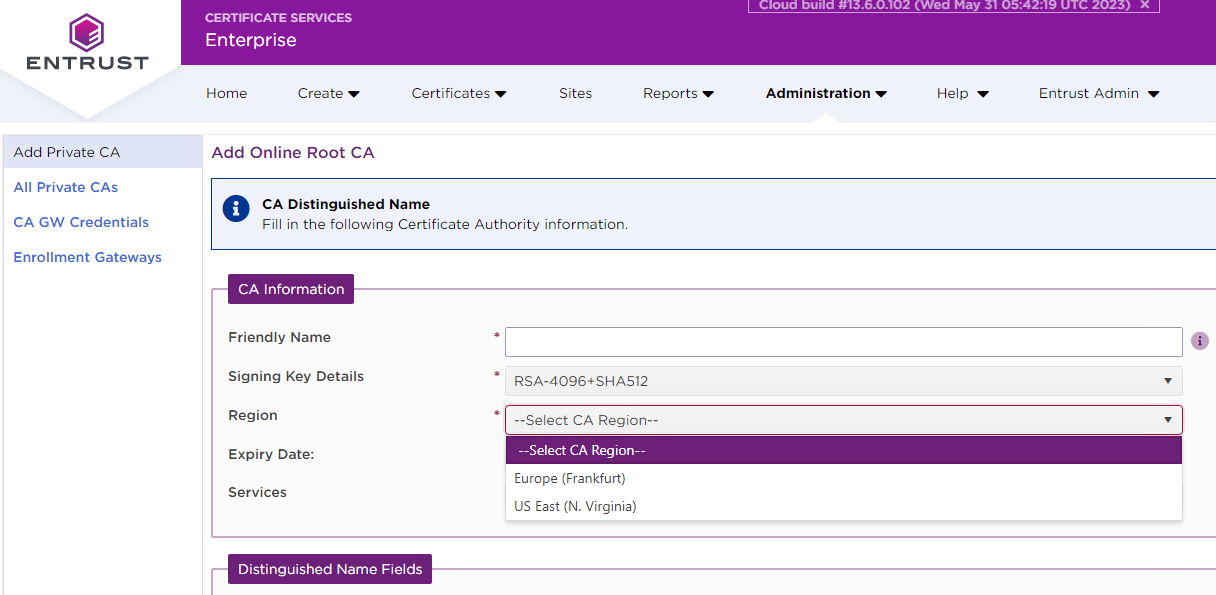
- Enter the values described below.
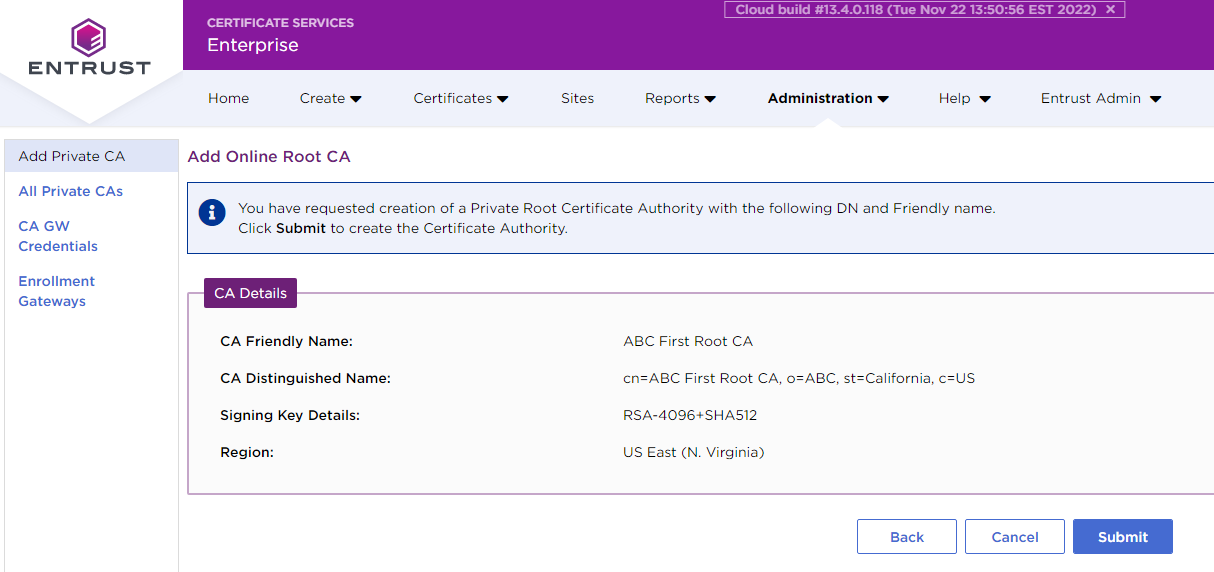
- Click Next and review the CA information.
- Click Submit.
- In the confirmation request, click OK to start the CA creation process.
- When the CA creation completes, check the CA details in the CA grid view.
- Refresh the grid. You will notice that the status changes to Active.
Friendly Name
Enter an informal name for the new CA.
Mandatory: Yes.
Signing Key Details
Select one of the algorithms described in Certification Authority instantiation.
Mandatory: Yes.
Region
Select the region in which the CA will be hosted.
The region of the root CA decides the region of the issuing CA.
Mandatory: Yes.
Expiry Date
Select the expiry date for the CA certificate. Use the date picker or enter a date in the following format.
mm/dd/yyyyMandatory: No. If you do not assign a specific expiry date, the expiry period defaults to 20 years for root CAs.
Services
Select a predefined set of certificate profiles.
For online root CAs, the current PKIaaS version only supports the External Sub-CA profile set.
Mandatory: No.
Service Profiles
Select the certificate profiles you want to enable in the root CA. See the following table for the certificate profiles included in each service.
Service | Service Profiles |
|---|---|
External Sub-CA |
Mandatory: No.
Distinguished Name Fields
Enter a value for each field in the Distinguished Name of the CA certificate.
Mandatory: Only the Common Name certificate field.


