This section explains how to configure system‑wide Discovery settings and upload a plugin.
Uploads
This setting enables you to configure a connection to the Certificate Manager. Once configured, scan results are automatically forwarded to the Certificate Manager for further review and management.
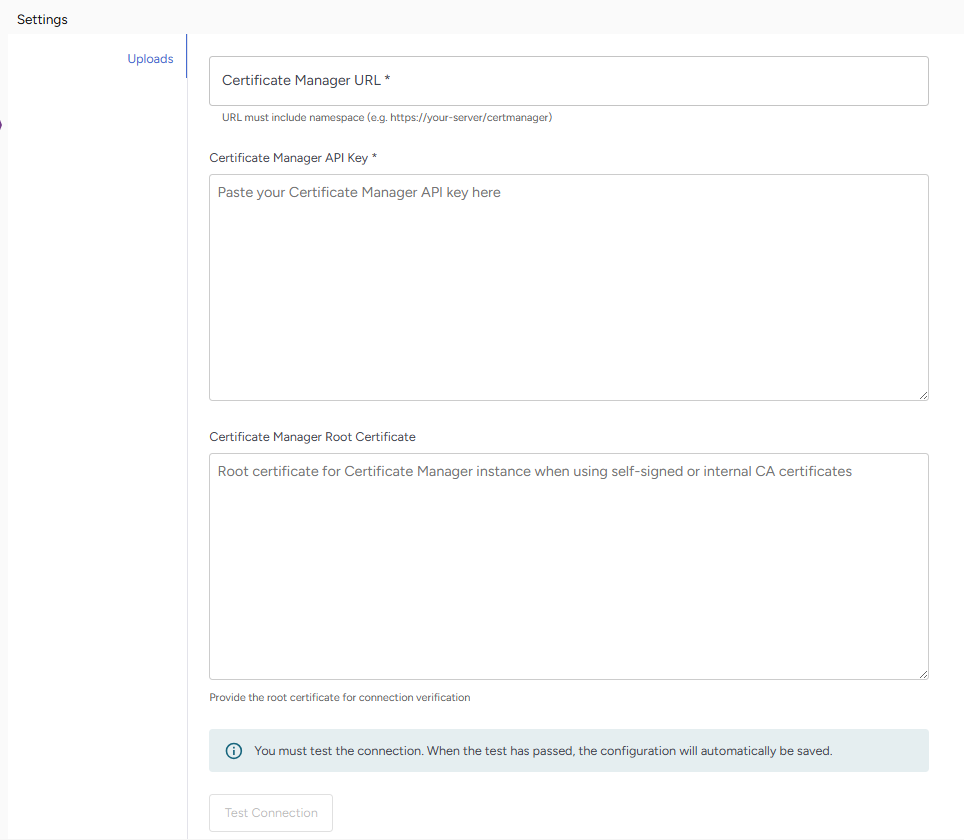
Explanation of fields include:
Field | Value |
|---|---|
Certificate Manager URL | The web address of your Certificate Manager instance (must include the namespace path, not just the server address) |
Certificate Manager API Key | Add your API authentication token. Get this token from your Certificate Manager administrator. |
Certificate Manager Root Certificate (Optional) | Provide the root certificate if your Certificate Manager uses self-signed or internal CA certificates. Leave blank if using publicly trusted certificates. |
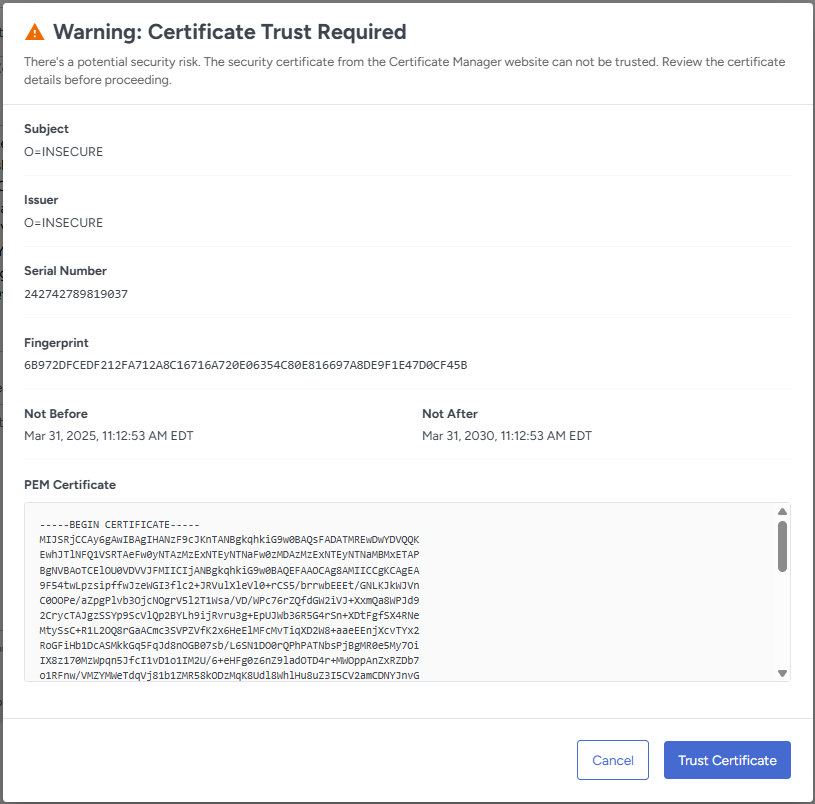
If SSL certificate verification is needed, a dialog appears showing certificate details:
- Certificate subject (who it's issued to)
- Issuer (who signed it)
- Serial number and fingerprint
- Valid dates (from/to)
- Full PEM certificate text
Review the certificate information carefully and click Trust Certificate.
Verify the connection is tested then Click Save.
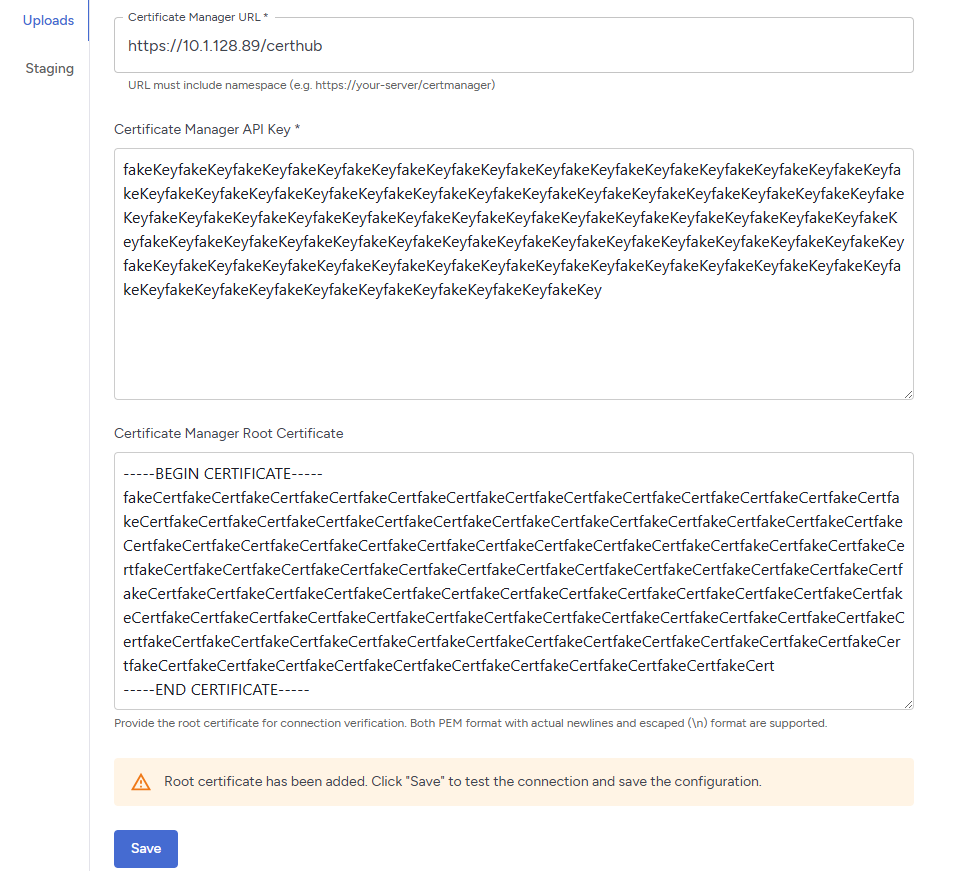
You cannot save your configuration until you've tested the connection.
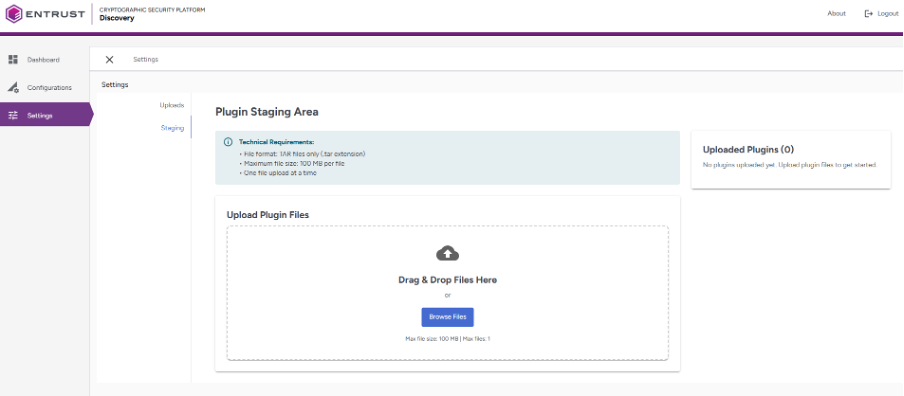
Staging
Follow the below steps to upload a plugin:
Creating the Plugin Tar File
First, build your plugin Docker image according to the Discovery Plugin Spec. Then create a tar file:
# Example: Save your plugin image to a tar file
docker save my-plugin:1.0.0 -o my-plugin.tar
Note that the image name cannot begin with "cspd/discovery/", or the upload endpoint (below) will reject it. So, in the above example, my-plugin:1.0.0 is fine, but cspd/discovery/plugins/my-plugin:1.0.0 would be rejected. You must re-tag the image (and remove the un-allowed tag), then do the docker save.
1. Click the Staging tab, (where you will find the staging area to upload a plugin)
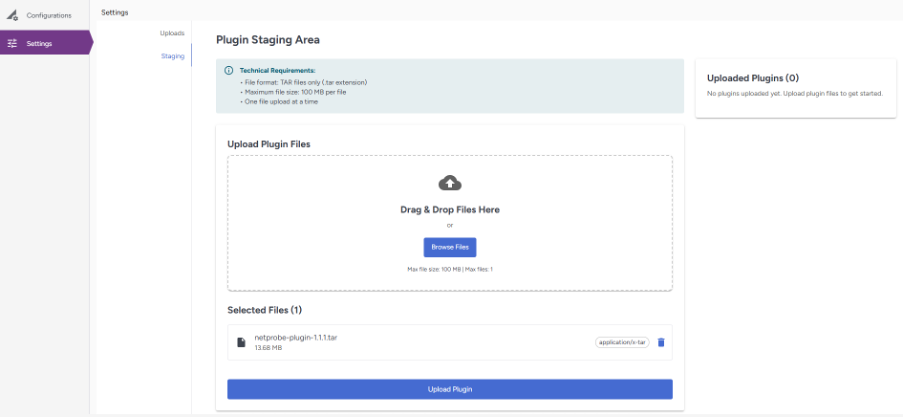
To select the plugin file, click the Browse File button or simply drag and drop the plugin file.
2. Once the plugin is selected, click the Upload Plugin button to proceed with the upload.
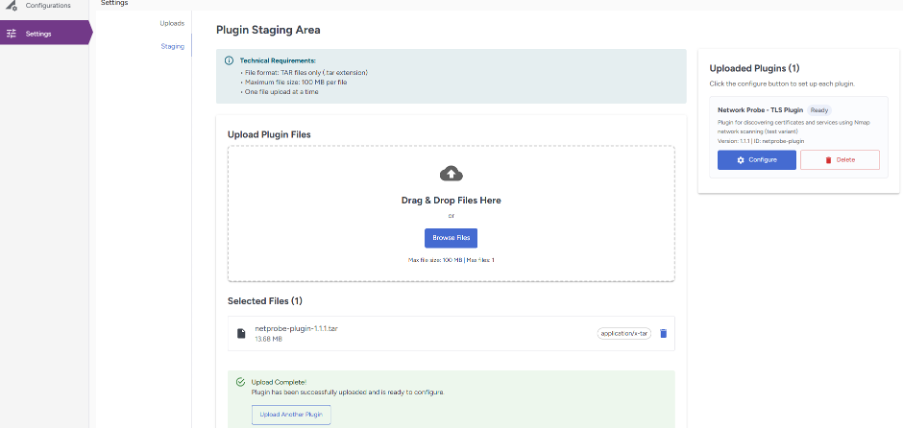
3. The plugin has been uploaded and is now visible in the right-hand panel.
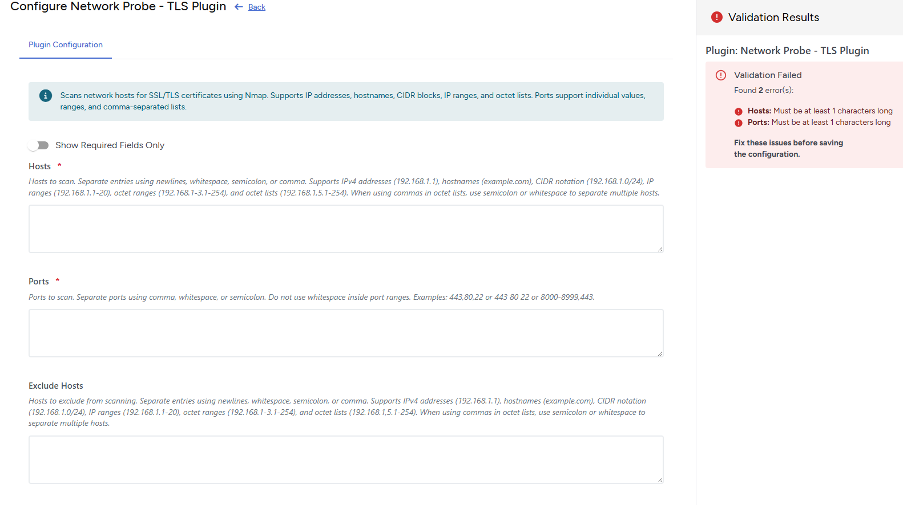
4. To Configure a plugin, Click Configure.
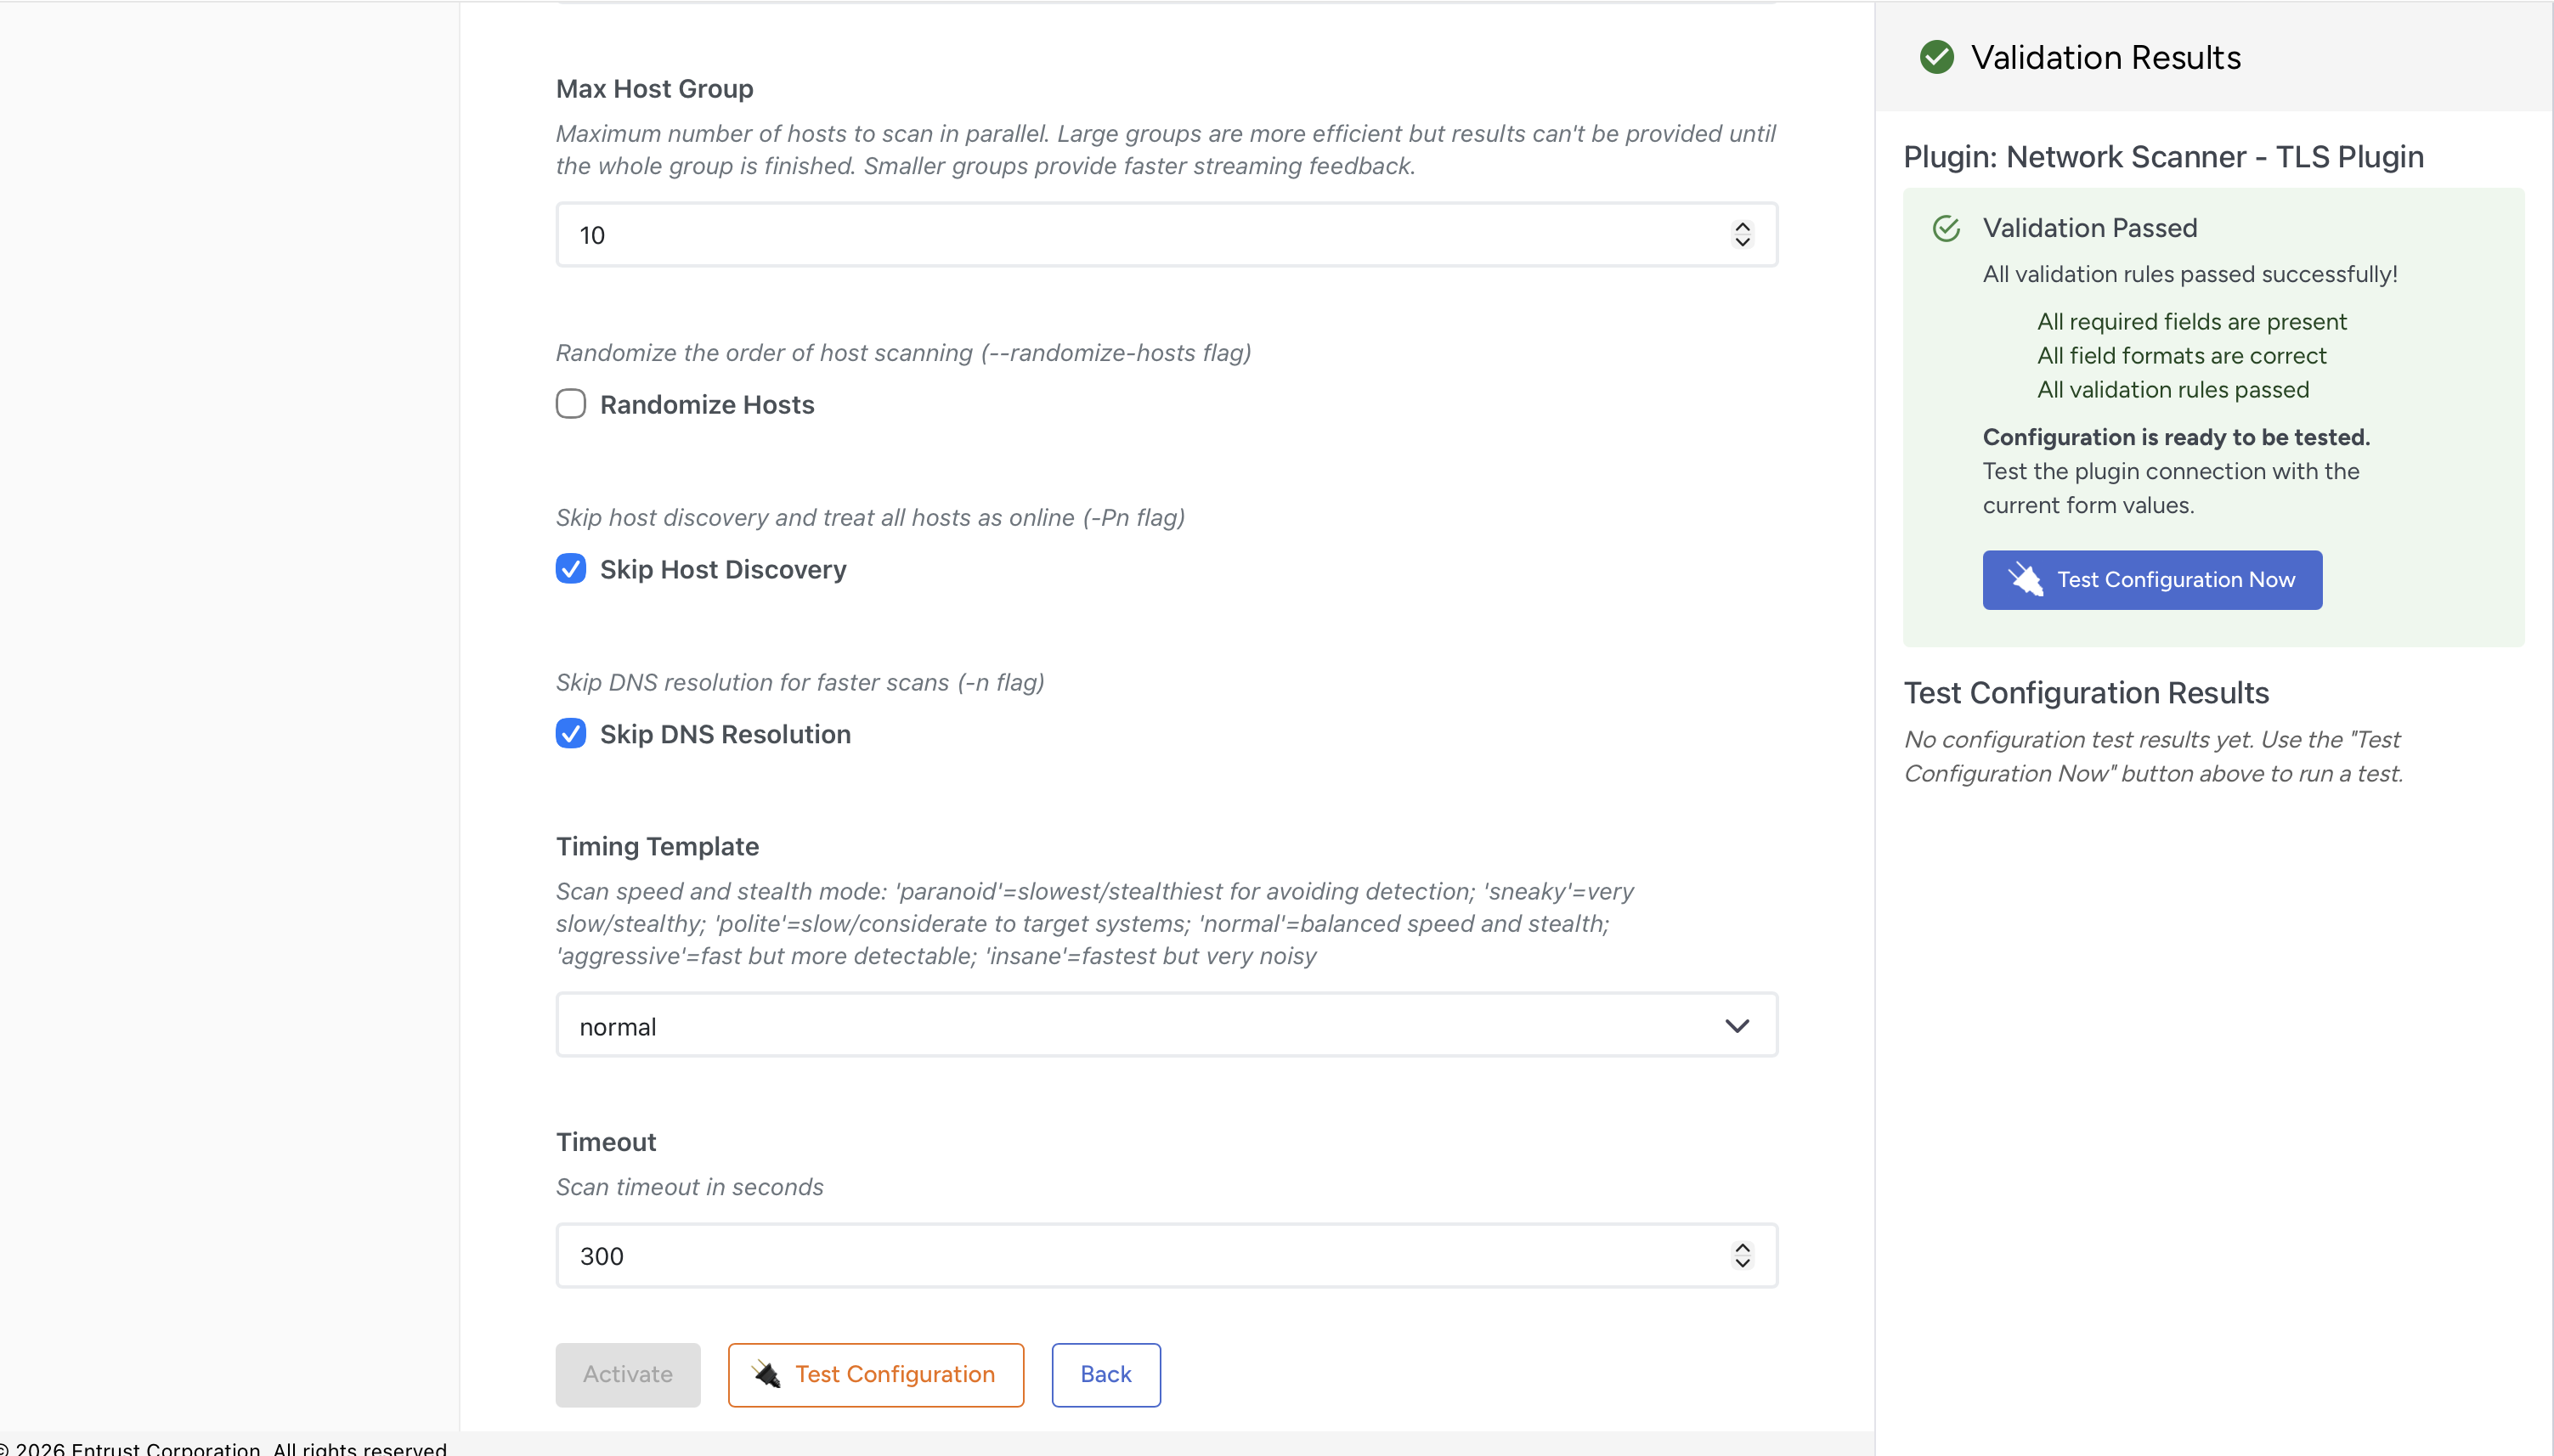
5. Enter the required details in the Hosts and Ports fields.
Note: To proceed with the next step, scroll down using the scrollbar.
6. Click Test Configuration button.
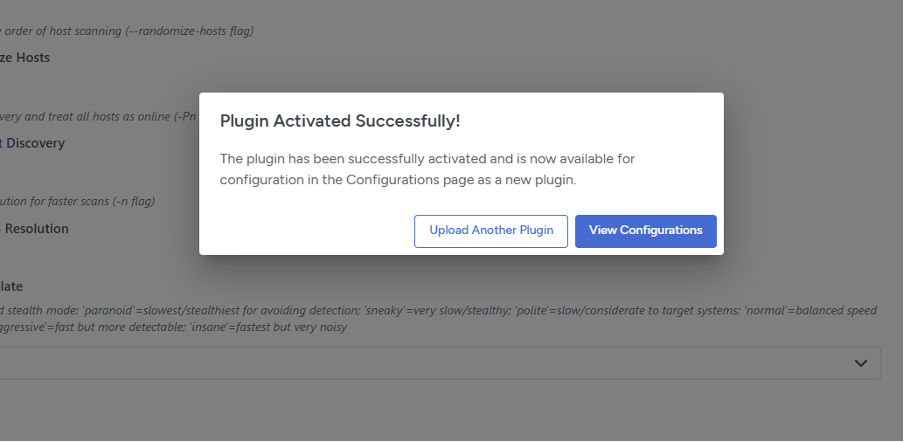
7. Once the test passed successfully, click Activate to make the configuration available for general use.
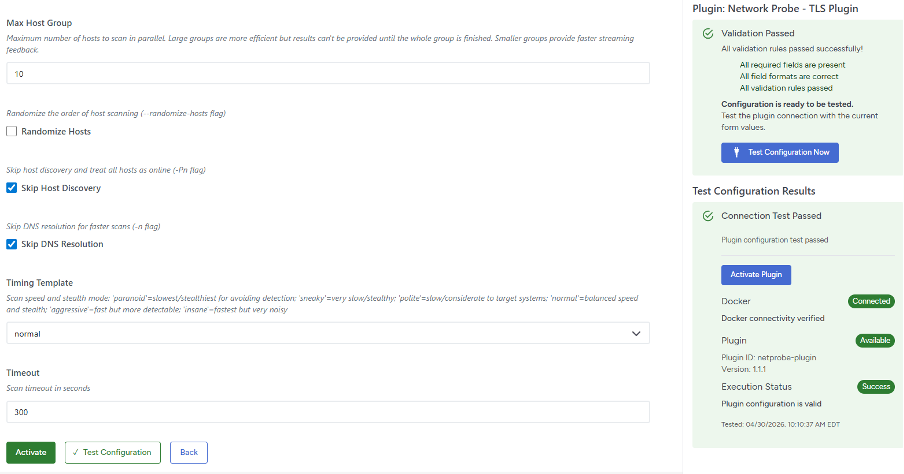
8. A confirmation message, ‘Plugin Activated Successfully,’ is displayed.
Note: User will notice that the uploaded plugin is no longer listed on the Staging page.